Encounter with VPN
The reason behind developing this project was to ease the process of connecting to VPN. In my daily work I constantly required a VPN connection, Cisco AnyConnect client was the obvious choice but because I was facing some issues installing the same in Ubuntu so instead I choose openconnect. After following below-mentioned step, I am now able to get connected to a VPN using few mouse clicks.
System Requirements
Currently I have tested this only on ubuntu 16.04, hopefully, in coming days I will be adding installation instruction for other OS too.
Installation
Install expect using this command: sudo apt-get install expect
Steps for installing openconnect:
First run command below to active th TUN module: sudo /sbin/modprobe tun
Install OpenConnect: sudo apt-get install openconnect
Download this module and make openconnect script executable like this:
chmod +x /path/to/openconnect.sh
Change these variables: GATEWAY, UBUNTUPASSWORD, USERNAME, PASSWORD present in script (openconnect.sh) as per your environment.
Run the script like this:
./openconnect.sh, this is when you are in the root directory of the module otherwise add path to your module.
Now we have to install Nautilus-Actions Configuration Tool, type this in the terminal:
sudo apt-get install nautilus-actions
Launch the Nautilus-Actions Configuration Tool from the Dash after installing it.

First, click the New Action button on the toolbar and type the name of your action into the Context Label box, may be something like this: Connect to VPN

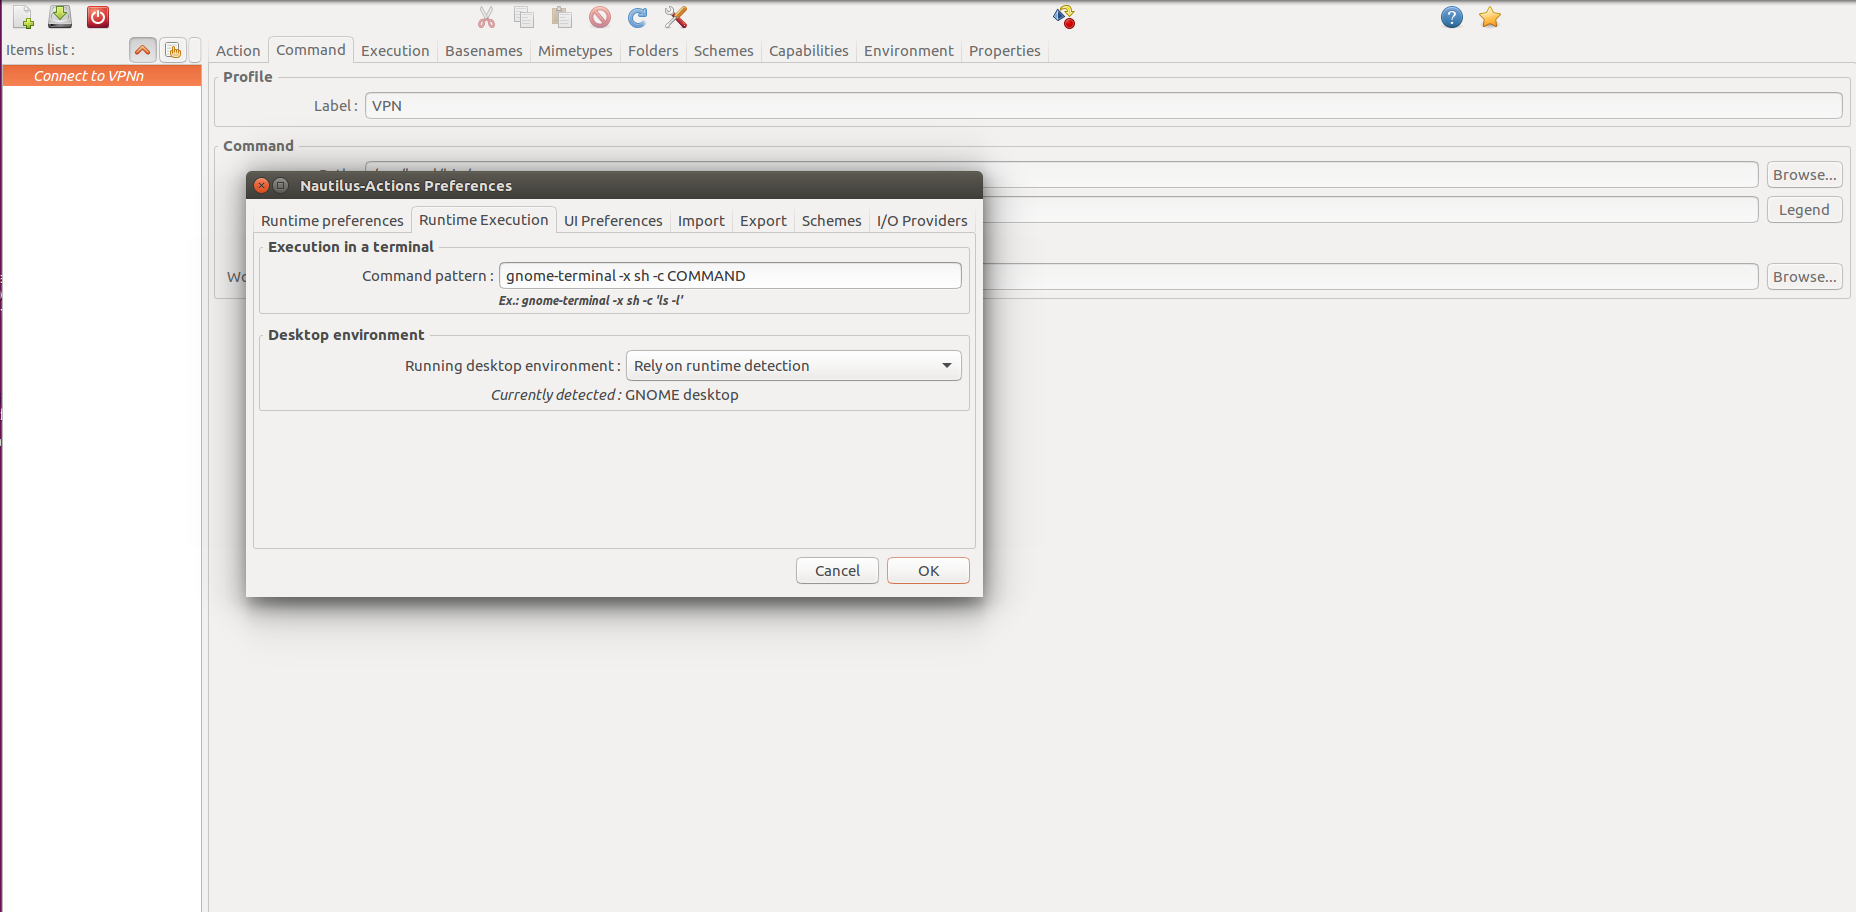
Click the Command tab and in Label box enter any suitable name like VPN and in Path box this: /usr/local/bin/vpn

Since we would need terminal for executing our newly created vpn command, in nautilus-actions tool, go to Edit > Preferences > Runtime Execution. In the "command pattern" field, enter: gnome-terminal -x sh -c COMMAND

Now we need to restart nautilus typing this command in the terminal: nautilus -q
After this you can access your newly created vpn command on right clicking under Nautilus-Actions actions.

Link to repo.
Happy browsing ![]()